

How To Change Headlight Bulb 2012 Gmc Terrain
GMC Terrain Headlight Bulbs Replacement Guide
How to change a burnt out low beam, high axle, turn signal or side mark light bulb in a 2010-2016 GMC Terrain.
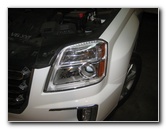
2016 Terrain Headlight
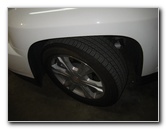
Plow Forepart Wheels
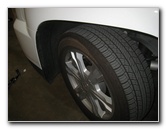
Plastic Wheel Well Liner
Owners of other General Motors vehicles such as the Buick Verano, Regal, LaCrosse, Cascada, Encore, Enclave, Envision, GMC Coulee, Sierra 1500, Acadia, Yukon, Denali, Savana, Spark, Sonic, Cruze, Malibu, Impala, Volt, Camaro, Corvette, SS, Trax, Equinox, Traverse, Tahoe, Suburban, Colorado, Silverado and Express may also notice these DIY instructions to exist helpful.
The replacement light bulb office numbers are every bit follows: Low Axle # H11, Loftier Beam # 9005, Front Turn Indicate # 7444NA and Side Marker # 194.
The tools needed to access and supercede the bulbs include a Torx T20 screwdriver, a flathead screwdriver, a 7mm socket and a ane/4" drive ratchet.
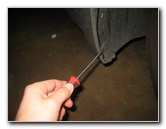
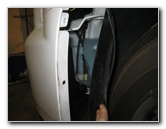
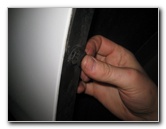
If you lot have an early model year GMC Terrain, at that place should be a round easy access comprehend held in identify past a single Torx T20 spiral. But remove the unmarried screw and rotate the bike well cover 1/4 turn counterclockwise before pulling it directly out.
Pry Upwards Top of Fastener
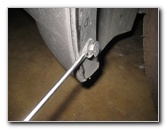
Pry Out Base of Pop Rivet
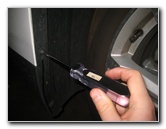
Loosen Torx T20 Screw
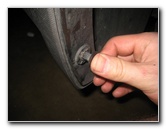
And then pry out the base of each fastener. Set the two pop rivet fasteners aside in a prophylactic place.
Remove the lesser screw by turning information technology counterclockwise with the Torx T-20 star bit screwdriver.

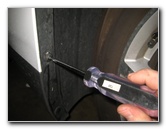
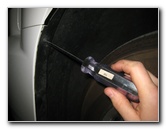
Pry Up Middle of 2nd Rivet
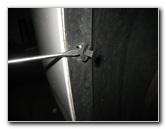
Pry Out 2nd Pop Rivet
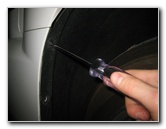
Remove 2nd Torx T20
Set the two Torx screws aside with the two pop rivet fasteners.
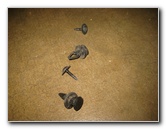
2 Pop Rivets & 2 Screws
Screw Nether Bumper
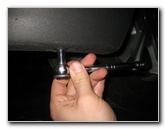
Remove 7mm Screw
Remove the screw by turning it counterclockwise with a 7mm socket and a i/four" drive ratcheting wrench.
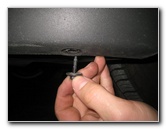
7mm Screw Removed
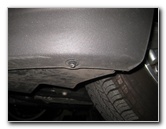
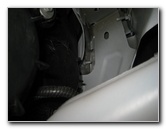
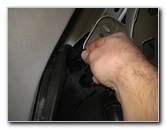
Pull Dorsum Wheel Well Liner
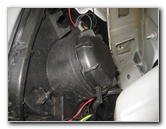
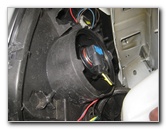
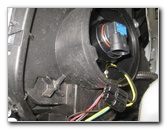
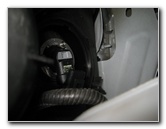
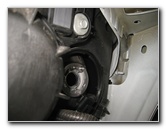
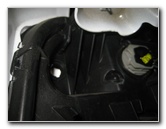
Low Beam Bulb Housing
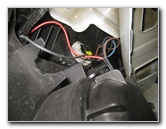
Gently pull back the blackness plastic wheel well liner or "splash baby-sit" to access the rear of the headlight housing.
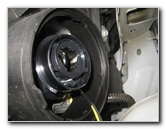
The Depression Beam headlight housing is located near the outer border of the assembly.
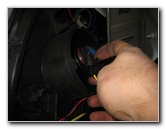
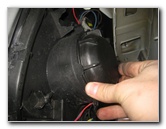
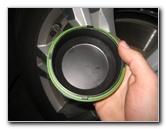
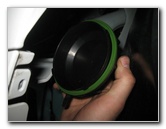
one/4 Turn Counterclockwise
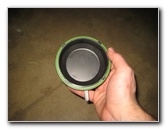
Dust Cap Removed
Base of Old Low Beam
Gear up the grit cap bated in a safe identify.
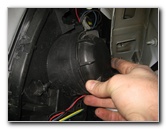
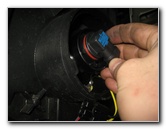
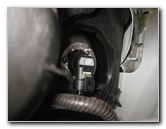
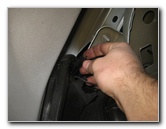
Pull Dorsum Retaining Clip
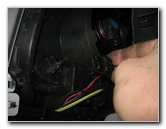
Ability Plug Asunder
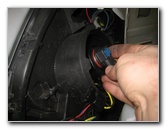
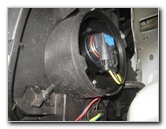
one/four Plow Counterclockwise
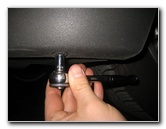
Rotate the base of the former low axle seedling 1/four turn counterclockwise and pull it directly out of the housing.
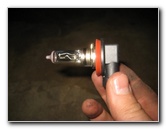
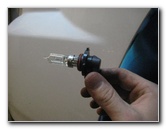
Remove Former Low Axle
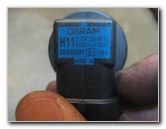
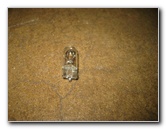
Sometime Osram H11 Seedling
Empty Bulb Socket
Insert New H11 Bulb
one/4 Turn Clockwise - Lock
Push On Power Plug
If y'all do get the new bulb dirty, wipe it clean with a newspaper towel moistened with rubbing alcohol.
Insert the new H11 seedling in to the socket and rotate it i/four turn clockwise to secure it in place.
Button the power plug straight on to the base of the new seedling until information technology clicks securely in to identify.
Replace Dust Comprehend
Loftier Beam Dust Cover
1/iv Plough Counterclockwise
The Loftier Axle housing is located closer to the inner edge of the headlight associates.
Rotate the round black plastic dust cover 1/iv turn counterclockwise before removing it.

Base of operations of Old Loftier Beam
Pull Off Electrical Connector
1/4 Turn Counterclockwise
Rotate the base of operations of the one-time bulb i/iv plough counterclockwise before pulling it straight out of the housing.
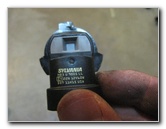
Sylvania # 9005 Bulb
Empty Bulb Housing
Install New 9005 Bulb
Avoid touching the drinking glass part of the new halogen seedling. Grease or dirt on the new bulb volition cause a hot spot and shorten its useful life. If it does get dingy, wipe it clean with a rubbing alcohol moistened paper towel.
Insert the new 9005 bulb in to the socket and rotate it 1/4 plough clockwise to secure it in place.
Push button the electric connector straight on to the base of the new seedling until it clicks securely in to identify.
Line Up Plastic Encompass
1/iv Turn Clockwise - Lock
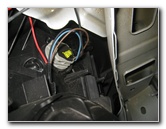
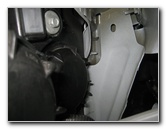
Turn Betoken Bulb Socket
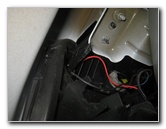
The Front end Plough Signal calorie-free bulb is located most the top of the headlight assembly.
(You can also admission the forepart turn signal seedling socket from the peak of the engine bay by removing the three plastic popular rivets on the cover in a higher place the headlight housing and fold it up. You will come across the turn signal socket but beneath the cover.)
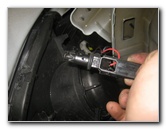
Rotate the black and gray plastic bulb socket 1/four turn counterclockwise before pulling it straight out of the housing.
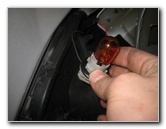
1/4 Turn Counterclockwise
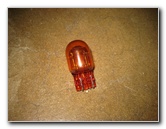
Pull Out Quondam 7444NA Seedling
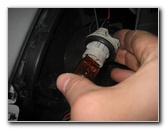
Button In New 7444NA Seedling
Push a new amber colored number 7444NA bulb in to the socket.
i/4 Plough Clockwise - Lock
Front Side Marker Socket
1/iv Turn - Remove
The Front Side Mark bulb socket is located nigh the top outer edge of the headlight assembly.
For some reason, the side marker bulb socket on this 2016 Terrain required a one/four plow clockwise to remove information technology from the housing.
In my experience, almost every other vehicle has bulb sockets that require a 1/iv plough counterclockwise to remove the seedling sockets.
And then if you can't remove the side marker seedling socket by rotating it in the normal counterclockwise direction, endeavor turning it the opposite direction, which is 1/4 turn clockwise.
Bulb Socket Removed
Pull Out Old # 194 Bulb
Empty Bulb Housing
If necessary, you lot can also employ any other miniature wedge base bulbs such as the 168, 158, 2825, W5W or a compatible LED bulb.
1/iv Turn - Lock
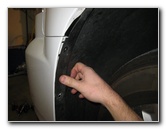
Supercede Wheel Well Liner
Re-Insert Pop Rivet
If your side marker bulb housing is "normal", you lot would rotate the socket 1/4 turn clockwise to lock it in place.
Button the bike bicycle liner dorsum in to place.
Make sure that the heart pieces of the two plastic fasteners are raised upwards.
Push In Eye To Lock
Supplant Torx T20 Screw
Supercede 2d Torx T20
Replace the two screws and tighten them in the clockwise direction with a Torx T20 screwdriver.
Replace Bottom 7mm Screw
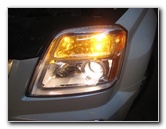
Exam New Headlight Bulbs
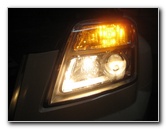
Testing High Beam Bulb
Test the new light bulbs past turning on the headlights, activating the gamble signals and flashing the high beams.
For more, check out my other 2010-2016 GMC Terrain DIY Repair & Maintenance Guides.

Source: https://www.paulstravelpictures.com/GMC-Terrain-Headlight-Bulbs-Replacement-Guide/
Posted by: turkallynay.blogspot.com
0 Response to "How To Change Headlight Bulb 2012 Gmc Terrain"
Post a Comment